Advanced Vim topics, tips and tricks
I see a lot of posts on Vim ’tips and tricks’ and decided I’d have a go at putting together my own list of things that don’t typically see the light of day, but are super powerful and useful to know about.
IMPORTANT: I want people to realise that they don’t need super complex Vim configurations with lots of third-party plugins, and this entire post is built on that motivation. This means you’ll find nearly everything described here is just plain Vim (no plugins). Don’t get me wrong, I use a few plugins, but I try to keep them to a minimum and rely more on the fundamentals of how Vim works.
NOTE: Remember that
:help <some_phrase>is your friend! So if you don’t know about any features I mention (and I don’t explain them in this post), then use Vim’s help feature. You can also try https://vimhelp.org/ too, which is a nice UI with autocomplete search box.
Let’s take a look at what we’ll be covering…
- Using Vim with no plugins
- Recording repeatable steps with macros
- Modifying content with
globalcommand - Substitutions, magic regex mode and other flags
- Searching and filtering content
- Processing search results with
cdoandcfdo - Filtering quickfix and location list results
- Processing files with
<T>do - Automating content modification using Ex commands from the shell
- Starting Vim with your last workspace
- Vim’s start-up process
- Debugging Vim issues
- Autocomplete with no plugins
- Understanding line feed and carriage returns
- Auto highlighting keywords (and creating your own custom highlighting)
- Sorting and filtering duplicates
- Miscellaneous tips and tricks
- Conclusion
But before we get into it... time for some self-promotion 🙊
Using Vim with no plugins
OK we’re going to start super basic here and demonstrate a simple, but completely usable, Vim configuration which will keep purists happy.
set nocompatible number cursorline expandtab hlsearch visualbell tabstop=2 shiftwidth=2
syntax on
nocompatible: Stops odd issues †.number: Turn on line numbers.cursorline: Highlight the current line.expandtab: Convert tabs to spaces.hlsearch: Highlight all search matches.visualbell: Stop Vim from beeping at you when you make a mistake.tabstop: Set tab size in spaces (this is for manual indenting).shiftwidth: The number of spaces inserted for a tab (used for auto indenting).syntax on: Enable basic syntax highlighting.
† Example: Using arrow keys in INSERT mode will send key sequences that are misinterpreted by
vi.
To try out this basic configuration use Vim’s -u flag. For example, you can start Vim with no configuration vim -u NONE and then manually apply the configuration as shown above, or you can put it into a separate file and start Vim with that configuration instead of your normal one vim -u ~/.vimrc-basic.
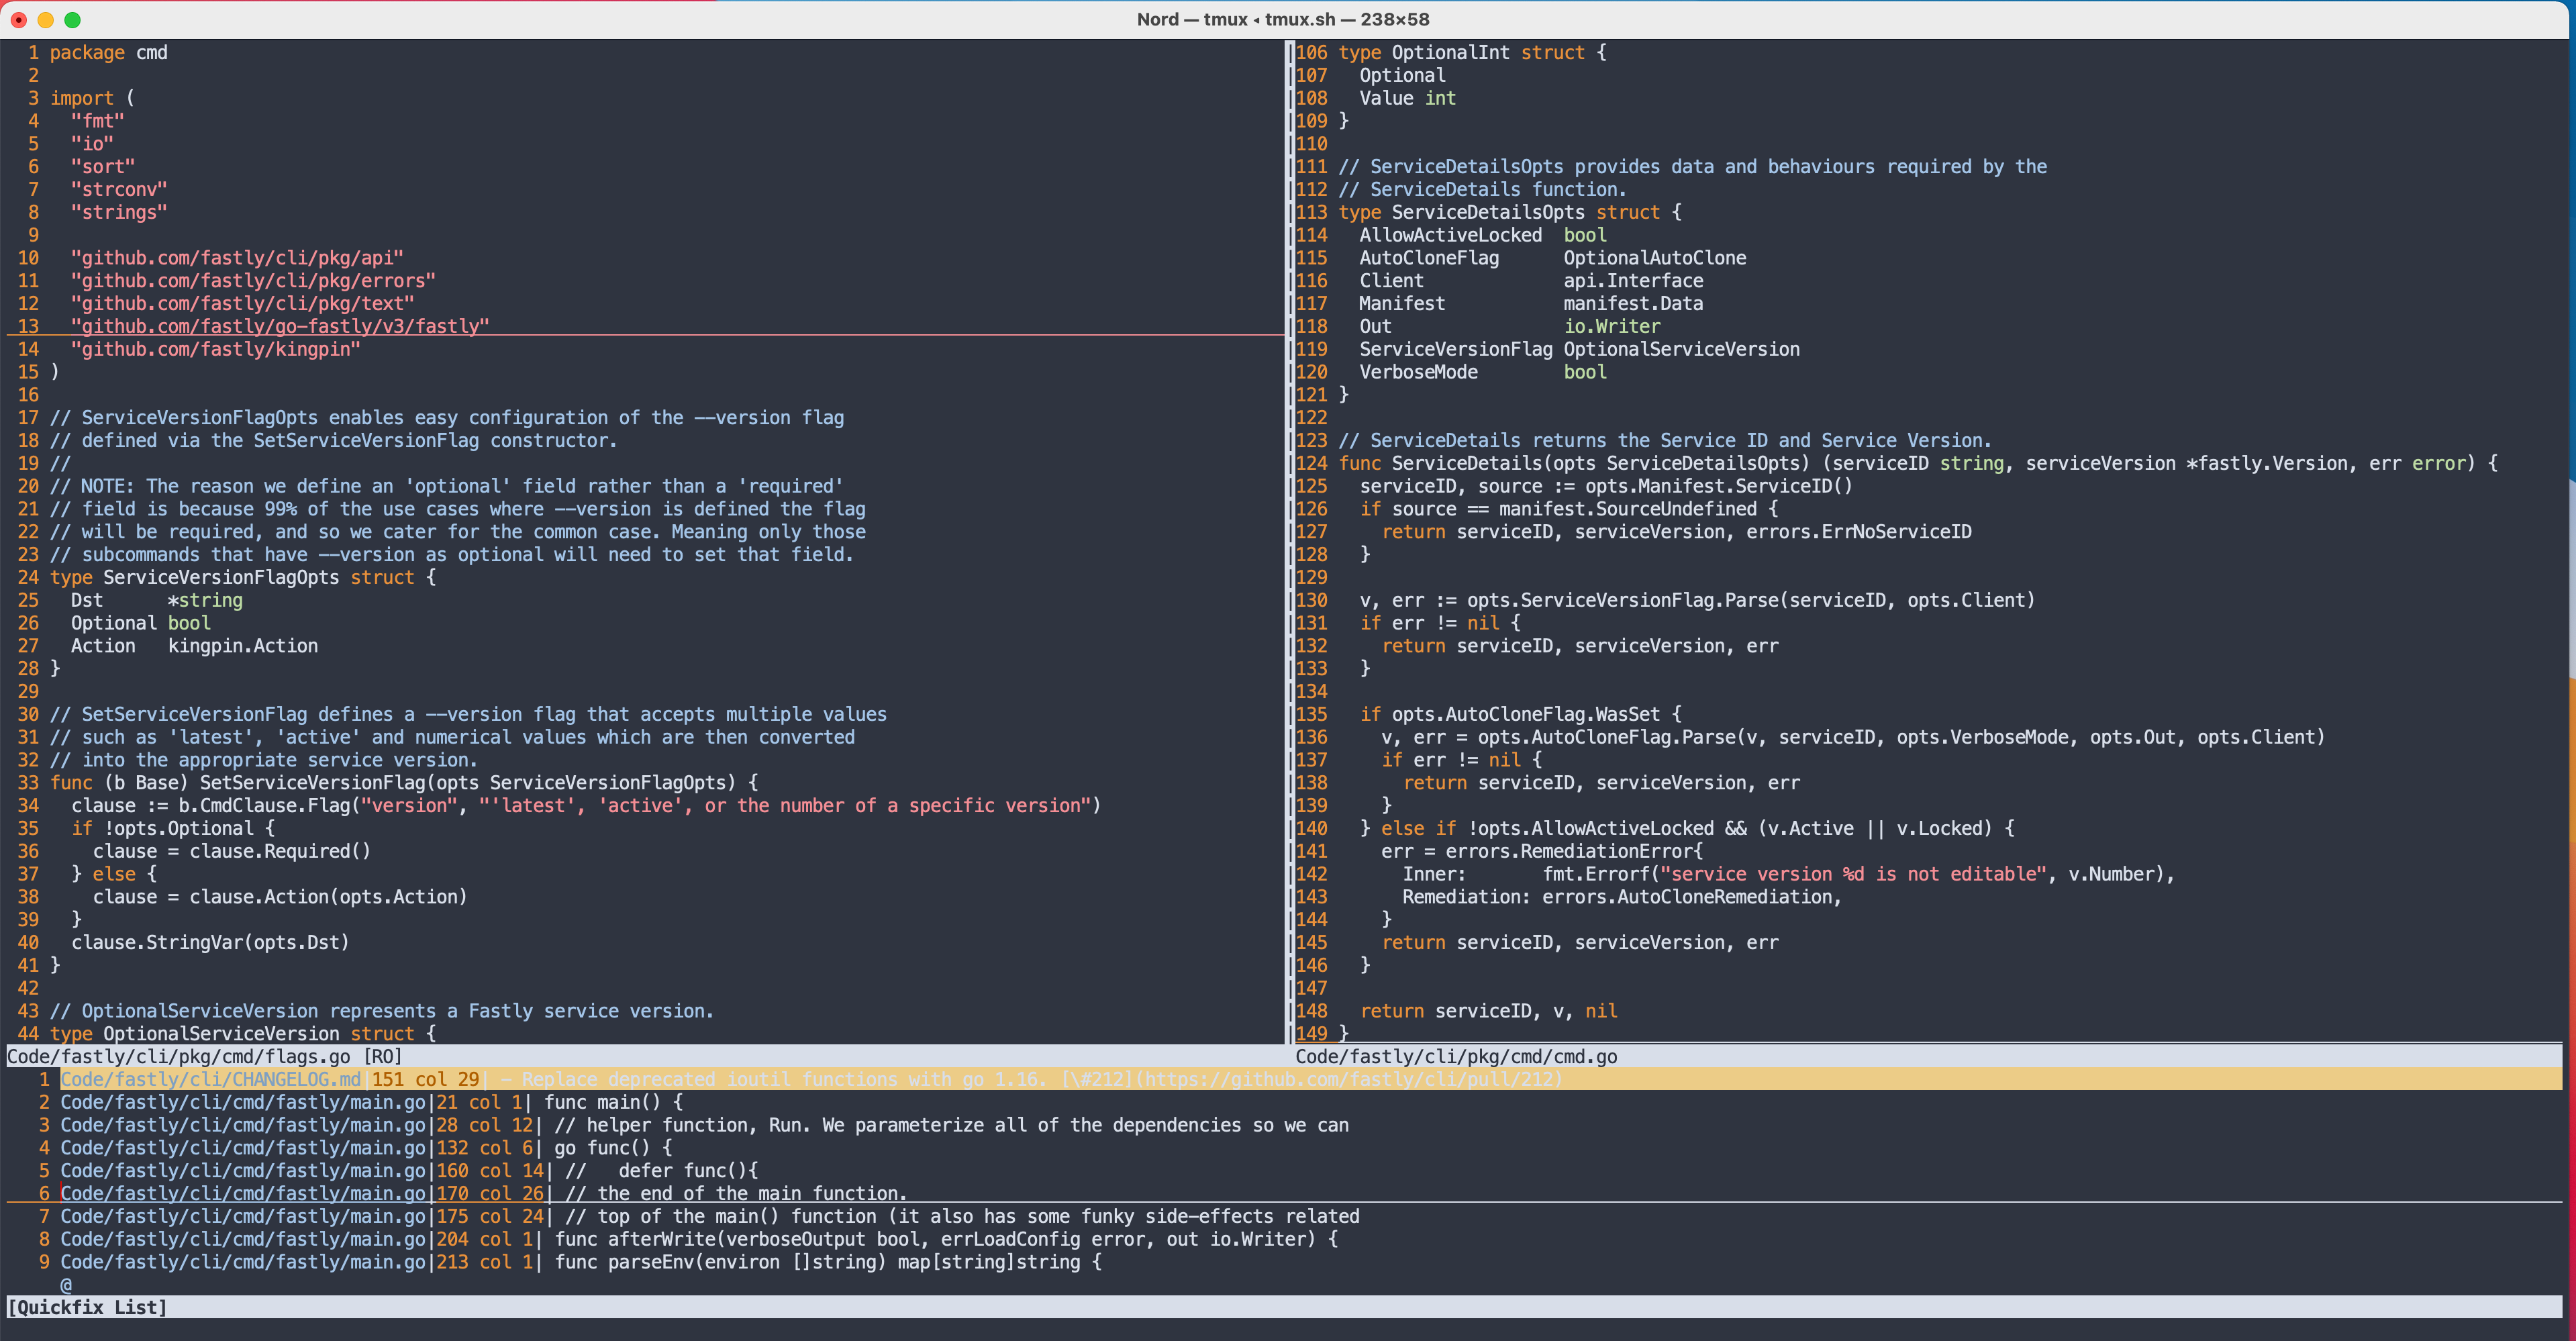
In the above screenshot you can see I’m just using the basic configuration (looks quite nice) along with a couple of split buffer windows (:vs).
I’m also a big user of Vim’s built-in tabs feature :tabnew (not shown in the screenshot) and also :lcd for changing each tab’s root location (which allows me to easily switch between multiple projects).
In the screen shot you can see I’m also using :vimgrep to search for code in my current project (e.g. :vimgrep /func/j **/* followed with :copen).
Although not shown in the screenshot I also use the built-in file/directory explorer, AKA ’netrw’, by executing :Ex. This let’s me manually traverse the current project directory (see also :Vex for vertical split and :Sex, no sniggering at the back, for a horizontal split). When using netrw I like to configure it to ignore certain files, which you can do like so:
" don't display .swp files
let g:netrw_list_hide= '.*\.swp$,.*\.DS_Store'
As mentioned earlier, using :h is a great way to learn about native features. As an example, I only recently discovered :cq which quits Vim without writing to any files and it will return an error exit code (this is useful in scenarios like writing git commit messages where you want to bail out at the last minute).
Another core feature of Vim I like to use is :marks which is a bookmark feature (see :h bookmark for more details). This can be useful for jumping around multiple locations within a single large file. The cool thing about marks is that they are unique to each file, so I tend to create marks using the registers a, b, c …etc as it’s easier to remember, and then I can use those same registers in each file (meaning I don’t have to jump to another file and be like “oh was I using d, e, f in this file or a, b, c?).
As well as using ! which lets me filter content through an external program. So for example, if I have the following lines…
foo
foobar
baz
quxfoo
…and I want to filter out any lines that contains foo, then I can visually select those lines and pass the selection through to my shell’s grep command like so:
:'<,'>!grep -v foo
This would result in those lines being replaced with the single line containing baz, as all the other lines were containing foo. Now a more Vim idiomatic approach to this particular problem is demonstrated in the section “Modifying content with global command”, but the takeaway is that the ! command is awesome.
Now a more practical example of using ! might be to take a single line of JSON and pipe it into a tool that pretty prints the data (the following example uses the % range to send the whole buffer to the program):
:%!python -m json.tool
NOTE: If you use jq you can both prettify
%!jqand minify%!jq -c.
Or if you didn’t want to replace the current buffer, but instead append a pretty printed version on the line(s) after the current line, then you would use :read like so:
:read !cat % | python -m json.tool
Want to populate the Vim quickfix list with output from some shell command? No problem: Vim already supports make by default so that :make <target> will execute the specified Makefile target for you (you’ll need to manually open the quickfix window :copen).
But you can also change the default program using set makeprg=<whatever>! Now you can pass your current buffer to it using :make %.
You can also do clever things like:
autocmd BufWritePost *.go :cex system('revive '..expand('%:p')) | copen
…which executes a command (in this case revive, a golang code linter) and passes it the current file path, and opens the results up in the quickfix window!
And the great thing about all of this is that there are no plugins required. It’s all standard Vim features. You just need to know they exist.
NOTE: If you do decide to use plugins, then don’t forget to
vim -c ":helptags ALL" -c ":q"to ensure you get all the relevant help information loaded.
Now, there may be times where you want a minimal config but with some extra treats, I’ll typically have a ~/.vimrc-core file with the following configuration that gives me the above ‘basic’ configuration (with some other configuration which isn’t essential but also isn’t superfluous either) along with some core plugins I like to use):
set nocompatible number autoread cursorline expandtab hlsearch visualbell tabstop=2 shiftwidth=2 clipboard+=unnamed wildmenu hidden noswapfile
syntax on
packadd cfilter

call plug#begin('~/.vim/plugged')
Plug 'junegunn/fzf', { 'do': { -> fzf#install() } }
Plug 'junegunn/fzf.vim' " <Tab> to select multiple results
Plug 'mileszs/ack.vim'
Plug 'unblevable/quick-scope'
call plug#end()

map <leader>f :FZF<CR>
map <leader>b :Buffers!<CR>
map <leader>g :GFiles?<CR>
map <leader>w :Windows<CR>
map <leader>l :Lines<CR>
map <leader>t :AgC<CR>

set wildignore+=*/.git/*,*/node_modules/*,*/.hg/*,*/.svn/*.,*/.DS_Store
set wildmode=list:longest,list:full

autocmd VimEnter * command! -nargs=* -bang AgC call fzf#vim#ag(<q-args>, '--path-to-ignore ~/.ignore --hidden --ignore "node_modules" --ignore-dir="vendor" --skip-vcs-ignores', <bang>0)

let g:ackprg = 'ag --vimgrep --smart-case --path-to-ignore ~/.ignore --hidden --ignore-dir=node_modules --ignore-dir=vendor --skip-vcs-ignores'

let g:ack_mappings = {
  \ "h": "<C-W><CR>:exe 'wincmd ' (&splitbelow ? 'J' : 'K')<CR><C-W>p<C-W>J<C-W>p",
  \ "v": "<C-W><CR>:exe 'wincmd ' (&splitright ? 'L' : 'H')<CR><C-W>p<C-W>J<C-W>p"}

silent! tnoremap <Esc> <C-\><C-n>
Yes it’s bigger than the ‘basic’ version, but remember this is still only 30 lines of configuration and it gives me a much richer experience. Again, the motivation for this post is about not needing plugins, and you should aim for understanding the fundamentals of Vim, but this gives you a little bit of both worlds 😉
Recording repeatable steps with macros
Vim allows you to record any typed characters so that you can then replay them again. This makes applying a set of complex changes multiple times across a code base much easier.
The workflow is actually really simple…
- Press
qfollowed by any valid register to start recording (you should see something likerecording @<register>in the status bar). - Start typing the changes you need to make.
- Press
qagain to stop recording. - Press
@<register>to replay the recorded steps.
I typically use the q register as it’s the quickest way to start recording a macro, as my finger already has to be over the q key to start recording any way (e.g. qq to record into q).
Now you might be wondering what happens if your steps need to include the q character (if that character is what stops a macro recording). Well luckily q only triggers the macro to stop recording if it’s the first character pressed as part of a new operation.
So to demonstrate, if I want a macro that deletes all occurrences of the letter q from the current line, then I would type the following:
qq0V:s/q//g<Enter>q
Let’s break these steps down…
qq: record into theqregister.0: move to the start of the line.V: select the entire line.:: start Ex modes/q//g: a substitution that deletesq‘globally’ (i.e. multiple times)<Enter>: I press the Enter key to have the substitution applied to the current line.q: I stop recording.
If you execute :reg you’ll see the q register contains something very similar…
0V:s/q//g^M
NOTE: Once you’ve replayed a macro (e.g.
@q) you can trigger it again without having to specify the register by typing@again, e.g.@@will rerun the last used macro.
If you need to run a macro a certain number of times then just prefix it with that number. For example, to run a macro six times I’d type 6@<register>.
Modifying content with global command
There are times when you want to execute an Ex command for any lines that match a specific pattern. That is where the :global comes in handy (this is different to substitution, which we’ll look at after).
Imagine you have a file with the following content:
foo
foobar
barfoo
You want to delete any lines that start with foo. To do that using the global command, would look like:
:g/^foo/d
NOTE: If you just want to see what would match, you could either use the
:pcommand (e.g.:g/^foo/p) or just leave off the command altogether as:pis the default behaviour.
What’s cool about the :global command is that because the command can be any Ex command, it means you can also use macros by way of the :norm command. In the following example we search for foo anywhere in the content and then apply the @q register to the matches…
:g/foo/norm @q | update
With :norm it also means the first example could be mimicked with it:
# both are the same
:g/^foo/d
:g/^foo/norm dd
Now want if you needed to use controls keys like <Shift>? Well, you can do that with the :global command too, but this time the command to be called would be the :execute command. The :execute command will enable you to provide a string that will be evaluated into an Ex command.
So imagine you had a file like:
foo
bar
baz
qux
And you wanted it to be like:
foo bar
baz qux
Then you would use the following (note that <Shift-j> in normal mode causes the following line to be joined to the current line):
:g/^/exe "norm \<s-j>"
You can also use the ! to cause :global to behave in the reverse (i.e. anything that doesn’t match the given pattern, apply the command to).
Substitutions, magic regex mode and other flags
Most people know how to use Vim’s :substitute command, but it seems people are less familiar with the use of \v as a way to enable ‘magic mode’.
For me ‘magic mode’ really just means my regex pattern doesn’t require escaping characters like + or () which is quite frustrating. I just prefix my pattern with \v and I can forget that for the most part (†). more like I’d expect it to from an engine supporting PCRE (Perl Compatible Regular Expressions, probably the most common implementation).
† One caveat when using magic mode is that you do need to escape curly brackets as most regex engines treat
{}as a ‘quantifier’ such as{1,3}and so if I’m programming/coding and I need to search for a{(which is common in programming languages), then I have to escape it\{. You can learn more about Vim’s regex engine via the help but also via vimregex.com.
Let’s start off by looking at \v not using a substitution but with a standard / search.
Imagine we have a project that instruments logging with different levels throughout. In this scenario imagine we have three log levels: debug, error and info that are used multiple times across the project. The log calls look something like:
log('foo', level='debug')
log('bar', level='error')
log('baz', level='info')
Lastly, imagine we want to find every instance of a log call but only those that are of the ‘debug’ and ’error’ level, we don’t want to get any results for an ‘info’ level log call.
To do this we need a lookaround assertion. For our purposes we’re going to use a lookaround ahead (specifically a negative lookahead). The way a negative lookahead assertion works is that you provide a pattern you don’t want to be matched.
For our use case, if using a normal PCRE engine, could look something like:
level='(?!info)
In Vim this translates to:
level='\(info\)\@!
Or if you’re using ‘magic mode’:
\vlevel\='(info)@!
Notice with magic mode we don’t have to escape a bunch of things like the capture groups (i.e. the parenthesis) or the @.
NOTE: If the number of permutations was small enough, then it’s arguably simpler to use an alternator pipe like
/\vlevel\='(debug|error)because remembering the lookaround syntax like@!(and its friends) might be hard to recall.
Next we’ll look at \u and \U (they have lowercase equivalents: \l and \L).
Remember our example log instrumentation calls from earlier, imagine we need to make the word level capitalised. Here’s how we could achieve that (note: I’ll show a better way after) using substitutions with magic mode and the \u special flag:
:%s/\v(l)(evel)/\u\1\2/
In this example we’ve used the % range to represent the entire content buffer, and we’ve used two capturing groups, one around the letter l and another capture group around the remainder of the word. In the replacement section we use \u to trigger an uppercase on the capture group \1 and then we print out the second capture group \2 following it.
Now this is actually more work than it needs to be because no matter what you capture, \u will only ever uppercase the first character, so we only really need a single capture group:
:%s/\v(level)/\u\1/
But what about the \U equivalent? That will uppercase everything that follows, so if we needed the word level to be LEVEL then that’s exactly what we’d need to use:
:%s/\v(level)/\U\1/
You could also use \U for uppercasing just the first letter, but you’d need to use either \e or \E (as a terminator) along with the two capture group design we had originally, like so:
:%s/\v(l)(evel)/\U\1\e\2/
NOTE: For more details refer to
:h sub-replace-special, but also:h whitespacewhich elaborates on some other special regex pattern flags.
Searching and filtering content
The following are native Vim solutions to finding files (and also searching multiple files for specific content).
- Finding a single file
- Finding content within one or more files
- Using external shell tool
- Search plugins
Finding a single file
To find a single file you can use the :find Ex command and pass it a wildcard glob character to help search recursively for the specified file pattern.
Example: we want to find a file called next.config.js:
:find **/next.*.js
NOTE: We could have just done
**/next.config.jsbut in case you weren’t familiar with the filename, then using another wildcard like we did helps to narrow things down.
Finding content within one or more files
You have two options for locating a string within a file (or multiple files) and that’s the following Ex commands…
:vimgrep:lvimgrep
The difference is that lvimgrep opens the results in a ’location’ window and every open split window can have its own location window, while vimgrep opens the results in a ‘quickfix’ window and there can only be one of those shown.
Meaning if you ran vimgrep in one split window and then ran it again (e.g. you’re looking for something different now) from another window, then your first set of results would be replaced with the latter results. If you instead used lvimgrep then you could have multiple search results displayed (one for each split window).
This is the basic syntax structure:
:vimgrep  /<searchTerm>/[gj] </path/to/project/**/*.go>
:lvimgrep /<searchTerm>/[gj] </path/to/project/*>
NOTE:
jprevents Vim from trying to open the first file match (also, if you don’t usejthen the location list won’t be populated with results as it’ll presume the first match was all you wanted), whilegmeans “ensure every match on a single line is displayed”.
Example usage (we’re searching for any reference to class anywhere in the project):
:vimgrep /class/gj **/*
:copen
For anyone unfamiliar, the copen command will open Vim’s ‘quickfix’ window, while the lopen command will open the ’location list’ (refer to :h copen and :h lopen to find related commands).
NOTE: a nice trick if you’re using the append version of
vimgrep(i.e.vimgrepa), is if you make a mistake populating the quickfix window, then you can use:cex []to clear it! See:cexfor details.
One interesting feature of :vimgrep is that you can use the result of a backtick expression to be the file source:
:vimgrep /ssh/j `find . -type f -name 'tmux*'`
You can also use a prior / search pattern like so:
:vimgrep /<C-r>// *
To clarify the above command, imagine you have a complex pattern you want to play around with and test with a single file so you use / to get Vim to jump into search mode for the current buffer content and then type in your complex pattern.
Once happy with your pattern, you now want to use it again for multiple files but you don’t want to have to type the pattern out again (especially in case it’s complex enough to easily include an unexpected typo).
So you type :vimgrep / and after that is where you would typically start typing your search pattern, at this point press <Ctrl-r> followed by / and Vim will automatically insert the last search pattern for you.
Imagine ... was the last search pattern, this would mean the Ex mode command would currently look like :vimgrep /... so you would need to finish the command / * (so it’s almost like you wrote the command in its entirety).
NOTE: if you use another plugin like
:Ack!then<C-r>/works to insert the last search pattern still (e.g.:Ack! '<C-r>/')
Using external shell tool
The :vimgrep and :lvimgrep commands use an internal Vim search implementation. Which might not be as performant as using a separate/external search tool.
This is why Vim also provides a :grep command, which allows you to utilise an external search program.
The default program it uses can be seen by running:
:set grepprg
Which should return something like the following (which is the system provided grep tool):
grepprg=grep -n $* /dev/null
I have mine set to use ag (i.e. the Silver Searcher):
set grepprg=ag\ --nogroup\ --nocolor\ --skip-vcs-ignores
NOTE: spaces have to be escaped with a backslash
\.
You can now use the new program like so (e.g. to find any reference to the word class using the Silver Searcher tool):
:grep class
:copen
NOTE: you still need to open the ‘quickfix’ window manually afterwards to see the results.
All this said, you can improve the performance of :vimgrep by prefixing it with :noautocmd.
:noautocmd vimgrep /{pattern}/[flags] {file(s)}
This is because :vimgrep uses Vim’s procedures to read files, which can involve execution of several autocommands. So this disables autocommands.
Search plugins
OK, the built-in tools are great and flexible, but I’ll be honest with you and say that in my day-to-day Vim usage you’ll find me using :FZF to find files and :Ack! '<regex>' <path> to find files that contain a particular string.
NOTE: Although I use the Ack Vim plugin, I actually configure it to use the
ag‘Silver Searcher’ shell command.
" Plugin Managment
" https://github.com/junegunn/vim-plug#example
"
" Reload .vimrc and :PlugInstall to install plugins.
" Use single quotes as requested by vim-plug.
"
" Specify a directory for plugins
call plug#begin('~/.vim/plugged')

Plug 'junegunn/fzf', { 'do': { -> fzf#install() } }
Plug 'junegunn/fzf.vim' " <Tab> to select multiple results
Plug 'mileszs/ack.vim'

" Initialize plugin system
call plug#end()

" PLUGIN CONFIGURATION...

" FZF (search files)
"
" Shift-Tab to select multiple files
"
" Ctrl-t = tab
" Ctrl-x = split
" Ctrl-v = vertical
"
" We also set FZF_DEFAULT_COMMAND in ~/.bashrc
" Also we use --ignore-dir multiple times there
" Using --hidden to allow searching hidden directories like .github
" The --hidden still respects .ignore where we ignore things like .git
" NOTE: you need --path-to-ignore ~/.ignore otherwise ag only uses local ignore ./.ignore
"
" Note use :map command to see current mappings (also :vmap, :nmap, :omap).
" Can also restrict to specific mapping `:map <Leader>w`
" https://vi.stackexchange.com/questions/7722/how-to-debug-a-mapping
map <leader>f :FZF!<CR>
map <leader>b :Buffers!<CR>
map <leader>g :GFiles!?<CR>
map <leader>w :Windows!<CR>
map <leader>t :AgC!<CR>
set wildignore+=*/.git/*,*/node_modules/*,*/.hg/*,*/.svn/*.,*/.DS_Store " Files matched are ignored when expanding wildcards
set wildmode=list:longest,list:full

" configure FZF text search command to have default flags included
autocmd VimEnter * command! -nargs=* -bang AgC call fzf#vim#ag(<q-args>, '--path-to-ignore ~/.ignore --hidden --ignore "node_modules" --ignore-dir="vendor" --skip-vcs-ignores', <bang>0)

" ack
let g:ackprg = 'ag --vimgrep --smart-case --path-to-ignore ~/.ignore --hidden --ignore-dir=node_modules --ignore-dir=vendor --skip-vcs-ignores'

" help Ack mappings to respect my split settings
let g:ack_mappings = {
  \ "h": "<C-W><CR>:exe 'wincmd ' (&splitbelow ? 'J' : 'K')<CR><C-W>p<C-W>J<C-W>p",
  \ "v": "<C-W><CR>:exe 'wincmd ' (&splitright ? 'L' : 'H')<CR><C-W>p<C-W>J<C-W>p"}
Now it’s probably worth me quickly mentioning that there are two small plugins I really like that’s related to this section:
- vim-searchindex which shows how many times a search pattern, such as
/your_pattern, occurs in the current buffer. After each search, it displays total number of matches, as well as the index of a current match. - quick-scope which highlights a unique character in every word on a line to help you more efficiently jump around on a single line using the standard
f,F,tandTmotions.
Processing search results with cdo and cfdo
So you’ve run a search using something like :vimgrep or :grep or maybe a plugin like :Ack, and you’ve populated a ‘quickfix’ window (or maybe a ’location list’ if using something like :lvimgrep) with search results. Now you want to apply some sort of change to each search result.
This is where the <c|l>[f]do commands come in handy:
- quickfix:
cdocfdo
- location list:
ldolfdo
The first thing you need to think about is whether you want your ‘action’ to be applied to each ’entry’ in the list or to each ‘file’ in the list. Think about the list of results you have… depending on what you searched for it’s possible you’ll see the same file appear multiple times because there were multiple entries found within the file.
So commands like cdo and ldo will operate on each entry, while cfdo and lfdo will only operate on each file. Meaning if a file appears 10 times, then you’ll have your action applied to the file just once rather than having the action applied to each entry.
Which command type you choose will depend on what your ‘action’ is intending to achieve.
Let’s consider an example scenario such as having a quickfix window containing two files:
example1.txtexample2.txt
The file example1.txt shows up multiple times, while example2.txt only shows up once.
The file example1.txt shows up multiple times because we searched for a phrase such as foo and that phrase happened to appear multiple times within example1.txt, while it only appeared once within example2.txt.
If you wanted to replace foo with bar using a subtitution like s/foo/bar/, and you used cdo, then all occurrences of foo would be replaced (i.e. across both example1.txt and example2.txt) because the substitution would be executed across each entry in the quickfix window.
But if you used cfdo then the substitution would only be applied once to each file, which would result in example2.txt having its only instance of foo replaced with bar while example1.txt would have only one instance of foo replaced with bar and the other nine instances left unchanged. This is because we didn’t provide a ‘range’, in this case %, in our substitution operation (e.g. :%s/foo/bar/ meaning apply the substitution across the entire buffer).
You could still use cfdo but you would need to specify %.
Be careful with tools that update the quickfix dynamically
The summary of this subsection is: be aware of any active plugins/tools that might dynamically update your quickfix window while your cdo command is still running.
To elaborate: I’ve found that my quickfix window is updated frequently/dynamically when using certain build tools.
For example, vim-go using gopls will update the quickfix list every time a file is written to. This is because it wants to display an updated list of files that might potentially contain broken code. That’s great when I’m generally developing on a go program, but not when I’m in the middle of trying to apply a set of changes globally using cdo.
The reason this causes problems when trying to apply changes is because cdo gets confused when it attempts to process the next quickfix entry but discovers the quickfix list of results has changed!
One way I could work around this is by using a location list, but most tools I use put results into a quickfix window so that’s not going to help me.
In this case I’ve found I’m better off using cfdo with %s/foo/bar/e | update which will write the buffer once, rather than the multiple times when using cdo with s/foo/bar/e | update. It’s also much more efficient using cfdo as it won’t write the buffer multiple times.
Your mileage may vary, but it’s important to think about this if you have certain build tools active that might mess around with the quickfix window half way through you processing the current list of results.
Let’s now look at an example where we execute a substitution for every ’entry’ listed in the quickfix window:
:cdo s/foo/bar/ | update
You don’t need to pipe to update. I just do that because, most of the time, when I modify a file it’s because I want to save the changes 🙂
Now, to execute a macro introduces some interesting things to think about. For example, macros only execute once so if you need them to be executed multiple times, then you need to tell them to execute across a ‘range’ (e.g. the entire buffer or a section of lines, like %norm! @q). Having a macro run multiple times is fine when you’re dealing with content that is grouped together sequentially, but when wanting to apply a macro on a ‘search pattern’, then there’s no guarantees that the search results will be in the required order/grouping.
This is why I always use cdo when needing to apply a macro across multiple files (you’ll notice I also need to use execute so I can evaluate my expression norm @q as an Ex command):
:cdo execute "norm @q" | update
Filtering quickfix and location list results
What’s interesting about ‘quickfix’ and ’location’ lists is that you can further filter their results. Now, admittedly if you’re using a third-party plugin like Ack, then yes you do have more control over the search pattern using additional flags provided by a third-party plugin that will help to filter the number of results, but I’d argue there are still situations where you need even more fine grained control over what’s displayed in the quickfix/location lists.
If you’ve taken the purist (i.e. no plugins) approach, then using the built-in Vim search (e.g. vimgrep/lvimgrep or even a custom configured grep to use an external command) will not offer much in the way of configuring the filtering of results (at the end of the day these built-in tools are useful but limited).
So what additional tools does Vim provide to us? In this case you can utilise either Cfilter or Lfilter to filter your search results. These two commands are internal Vim plugins that need to be loaded using Vim’s packadd command (I actually have this added to my .vimrc as I always forget to call packadd).
Here is an example of how to use Cfilter. I’m going to search for the phrase “vim” across my blog, which ends up returning quite a few results across multiple files. Turns out I’m only interested in files that are Markdown files and so I need to filter the results to only show me those files…
NOTE: Sure you could use
wildignore(or maybe evensuffixes, although it won’t solve our problem, only alleviate it slightly) but it’s really a hammer solution, where we want a scalpel.
:vimgrep /vim/ **/*
:packadd cfilter
:Cfilter /\.md$/
You’ll see I’ve used / as delimiters around the regex pattern, but you can also use other single-byte characters (refer to :h pattern-delimiter or the online help).
OK, so what’s interesting here is that Cfilter/Lfilter will search (using a regex pattern) both the filename and the text entry itself. So trying to filter for just \.md would still include more files than just Markdown files because the content of the file is also searched and I have .txt files that include both vim and the filter pattern .md.
This is why I also use the regex anchor $ because it’s less likely for me to accidentally hit a match, and so I’m more likely to just get back results that are Markdown files containing the phrase vim.
As you can see the default behaviour of the filter is to keep only those results that match your pattern. If you want the filter to work in reverse so it removes anything that matches your pattern, then add ! to the command like so :Cfilter! /your_pattern/.
NOTE: As this is a regex pattern you can still use
\vto get ‘magic’ mode. For example/\vyour_pattern/.
Processing files with <T>do
We’ve already seen :cdo and :cfdo, but there’s so many more ‘do’ commands that can enrich your Vim experience:
:bufdo: apply action to all buffers (:h ls).:tabdo: apply action to all tabs.:windo: apply action to all windows (multiple windows might all display the same buffer).:argdo: apply action to all arguments in the:h arglist.
Now admittedly I mostly use :cdo/:cfdo over any of the above because they are, for me, the most practical tools that give me massive value in my day-to-day work. That said, I do like to use :bufdo as well (I don’t think I ever use :tabdo or :windo to be honest, although it’s good to know they exist in my toolbox), and the action I do the most when using :bufdo is when I want to clear out a bunch of buffers. So I’ll run :bufdo bd (:h bd).
I’ll give you another example of how you might want to use something like :bufdo which came in handy for me recently. I had a git project which caused a bunch of conflicts in my files when I had rebased another branch. So I opened up all the conflicting files so I could locate the specific git syntax <<< HEAD that surrounds where the conflicts were.
At this point I went through each file and was fixing the issues, but then I realised I wasn’t sure if I had fixed all occurrences of <<< HEAD in each file I had edited. I guess I could have just run vimgrep over the whole project, but it’s a large project and it would have taken a lot longer than I would have liked because of the fact it was a very large project.
the solution in this case was to search over the files that I had open using :bufdo mixed with the :execute command and the append specific version of vimgrep (i.e. vimgrepa):
:bufdo execute "vimgrepa /<<< HEAD/ %"
As you can see I was also able to utilise the % register to access the current file name. So for each iteration of bufdo through the buffer list, the % register would be updated to reflect the name of the file.
Each of these ‘do’ commands are all fairly self-explanatory, but let’s take a moment to look at argdo as it has some interesting extra considerations. When you open Vim for the first time there is an ‘argument list’ that gets populated. All files open in the argument list will match what’s in your buffer list, unless you start opening/closing buffers. But regardless of changes to the buffer list, the arglist will stay the same, which means just because you have a file name in the argument list doesn’t mean you have a buffer open for that file.
That last bit is important because it can be a reason for using :argdo over :bufdo. Typically they produce the same end result because when you open Vim with three files given as arguments, then the arglist will contain those three file names, but there will also be three buffers opened with those files as content.
You can’t accidentally add a new argument to the arglist because you have to explicitly call :argadd (for deleting you need :argdelete). Where as with the list of buffers, that gets updated whenever you open a new file (and that is very easily done, especially when searching for content), but importantly the arglist will stay unchanged.
Automating content modification using Ex commands from the shell
Vim has a nice feature where it allows you to easily run Ex commands against a file from the shell. The summary of which is:
$ vim -E -s some_file.txt <<-EOF
  :%s/foo/bar/
  :update
  :quit
EOF
But stick around for a few more details…
Vim doesn’t handle stdin like other posix commands:
$ echo foo | vim

Vim: Warning: Input is not from a terminal
Vim: Error reading input, exiting...
Vim: Finished.
If you pass - to Vim, then it will accept the stdin and copy it to a new buffer…
$ echo foo | vim -
Before we look ahead at how to handle stdin a bit better, let’s consider the + flag which tells Vim what line to start on (the following example tells Vim to jump to line 10):
$ vim ~/.vimrc +10
This will become relevant when we look at two other flags -e and -s (:h -e, :h -s and :h -s-ex)…
$ echo foo | vim - -es +'%p' +'qa!'

Vim: Reading from stdin...
foo
When using the -e and -s flags, we’re able to use + to execute Ex mode commands.
NOTE: If you don’t use
+'qa!'then Vim will cause the terminal to hang. You also need the!otherwiseqawould (if dealing with a traditional Vim UI) show a message saying the buffer has been edited and can’t be quit.
To avoid the Vim: Reading from stdin... message we need an additional flag --not-a-term:
$ echo foo | vim - -es +'%p' +'qa!' --not-a-term

foo
So now if we want to manipulate the content (let’s say uppercase the word foo to FOO) we can do:
$ echo foo | vim - -es --not-a-term +'norm VgU' +'%p' +'qa!'

FOO
NOTE:
normsays execute the following characters as if the user is typing them, soVselects the entire line andgUuppercases the selection. We then print the output to stdout%pand then quit without trying to save the modifications.
Starting Vim with your last workspace
Now this feature I’m going to describe I don’t use that often, but there’s been a few occasions where it’s saved me a lot of hassle. The feature i’m going to talk about is :mksession. There are lots of things you can do with :mksession so read the help documents, but I’m only going to cover the basics here because that’s mostly all I ever need to use.
The summary of this Ex command is that it will take a snapshot of your working environment inside Vim and will reproduce it the next time you startup Vim.
The way it does this is to stick every buffer, window, window size and layout configuration into a Session.vim file (don’t forget to add this file to your .gitignore).
So if you need to stop Vim suddenly (for whatever reason) and you don’t want to lose your workspace layout because you’ve got lots of files open that you’d have to write down filename/paths to, and maybe you have specific window splits setup to work on multiple files in a specific order and you don’t want to have to remember what the layout was (especially if like me you have multiple Vim tabs open and each one has its own window splits etc) then you just need to run :mksession before closing Vim.
To start Vim with the session snapshot you would run:
vim -S Session.vim
That’s it! Your entire workspace is spun up exactly how you left it.
Once you open Vim again you might want to change some of your workspace. If that’s the case and you want the Session.vim file to record that updated layout in its snapshot, then run the :mksession! command (notice the extra ! at the end to force overwriting the original Session.vim file).
Vim’s start-up process
The Vim documentation explains all the various steps that are gone through during ‘start-up’, see :h startup.
In short, Vim executes :runtime! plugin/**/*.vim meaning any directories listed in the runtime path (:h runtimepath) will be searched for a plugin sub-directory and all files ending in “.vim” will be sourced (in alphabetical order per directory).
If you want to see what’s in your runtime path you can execute:
:set runtimepath?
NOTE: if you want to debug the start-up process:
vim --startuptime some_log_filename.
To learn more about the various directories Vim uses, then refer to the :help documentation, for example:
~/.vim/autoload/...(:h autoload)~/.vim/plugin/...(:h plugin)~/.vim/ftplugin/...(:h ftplugin)~/.vim/after/...(:h after-directory)
Although I will take a brief detour through that last item…
The after directory
The after directory can be used by both Vim ‘users’ and by Vim ‘plugin authors’ to override specific plugin configuration (that could be either ~/.vim/plugin/... or ~/.vim/ftplugin/...).
For example, the Vim plugin author for vim-polyglot adds this file: ~/.vim/plugin/vim-polyglot/after/ftdetect/rspec.vim which overrides the filetype configuration for rspec files.
Where as a Vim user might want to override the behaviour of a plugin they’re using (e.g. the FZF plugin) by adding the file ~/.vim/after/plugin/config/fzf.vim, and due to how Vim loads ‘after’ scripts, that file would get loaded. Although it’s important to add a guard into the code to ensure it only executes if the FZF plugin actually is loaded (otherwise this after script could cause an error)…
" include guard; quit if fzf isn't loaded
if ! exists(':FZF')
    finish
endif
Debugging Vim issues
First thing first, run :se to see all the Vim options that have changed from the Vim defaults. This can be a good ‘at a glance’ perspective on what might be wrong or why you’re seeing some sort of unexpected behaviour.
To check a specific setting and who (i.e. which plugin or script) last modified it, use :verbose set <setting>?.
For example, :verbose set shiftwidth? returns…
shiftwidth=2
      Last set from ~/.vimrc
You can also see what mappings have been configured using the map command.
For example, to see all mappings with the leader key…
:verbose map <leader>

x  \y            :Buffers<CR>
        Last set from ~/.vimrc
   \t            :FZF<CR>
        Last set from ~/.vimrc

n  \z            :ALEPrevious<CR>
        Last set from ~/.vimrc
n  \x            :ALENext<CR>
        Last set from ~/.vimrc
NOTE: see
:h map-listingfor the various modes (n= normal,x= visual, etc).
The same principle works with other mappings like <Ctrl-k> and <Ctrl-j…
:verbose map <c-k>

n  <C-K>         <Plug>MoveLineUp
        Last set from ~/.vim/plugged/vim-move/plugin/move.vim
v  <C-K>         <Plug>MoveBlockUp
        Last set from ~/.vim/plugged/vim-move/plugin/move.vim

:verbose map <c-j>

n  <NL>          <Plug>MoveLineDown
        Last set from ~/.vim/plugged/vim-move/plugin/move.vim
v  <NL>          <Plug>MoveBlockDown
        Last set from ~/.vim/plugged/vim-move/plugin/move.vim
If you want to know what the default commands that Vim defines, then take a look at :h index and drill down into the various commands per ‘mode’.
NOTE: Vim also has a debugger you can use:
vim -D ~/.vimrc(see reference below for details).
Lastly, there is the -V<N> flag that sets the verbosity of Vim output when starting up…
" >= 1  When the viminfo file is read or written.
" >= 2  When a file is ":source"'ed.
" >= 5  Every searched tags file and include file.
" >= 8  Files for which a group of autocommands is executed.
" >= 9  Every executed autocommand.
" >= 12 Every executed function.
" >= 13 When an exception is thrown, caught, finished, or discarded.
" >= 14 Anything pending in a ":finally" clause.
" >= 15 Every executed Ex command (truncated at 200 characters).
NOTE: see
:h vbsfor details.
Usage example: vim -V9 ~/.vimrc, but you can also write the output to a log file instead (pro tip: use the log file approach) such as vim -V9foo ~/.vimrc which will write the output to the log file foo.
OK, time for the short sections… 🙂
Autocomplete with no plugins
So you want some form of auto-complete feature without the need for a third-party plugin, no problem…
filetype plugin on
set omnifunc=syntaxcomplete#Complete
Now you can execute <C-x><C-o> to get a very basic form of native code autocompletion.
Vim also provides the native command <C-n> for autocompletion based on words existing in all opened buffers.
Understanding line feed and carriage returns
This isn’t necessarily a Vim specific thing but it used to catch me out all the time. Looking for line breaks and inserting line breaks are two different things.
The term CRLF refers to Carriage Return (ASCII 13,
\r) Line Feed (ASCII 10,\n). They’re used to note the termination of a line, however, dealt with differently in today’s popular Operating Systems.
- Windows: CRLF (
\r\n) - Linux/Unix: LF (
\n)
Imagine in Vim you have a buffer like:
a
b
c
d
If you wanted to add an extra line space between each line, so it looked like:
a

b

c

d
You would need to use a substitution like:
:%s/\n/\r\r/
Notice we’re looking for a ’line feed’ \n (because that’s how macOS denotes a new line), while to get Vim to insert a line break we need it to insert two separate ‘carriage returns’ \r.
Auto highlighting keywords (and creating your own custom highlighting)
Vim can highlight certain words inside of code comments, such as…
BUG(Golang)FIXMENOTENOTES(Python)TODOXXX
The
NOTEworks in both Go and Python files and yet it’s not defined in the Go syntax file, which means it’s likely inherited from a default syntax file.
See the syntax files for…
You can add your own, see this StackOverflow post for the full details, but in summary it looks something like:
augroup myTodo
  autocmd!
  autocmd Syntax * syntax match myTodo /\v\_.<(TODO|FIXME).*/hs=s+1 containedin=.*Comment
augroup END

highlight link myTodo Todo
Sorting and filtering duplicates
This is such a small ’tip’, and is probably obvious to most Vim users, but just in case it isn’t…
Imagine you have some content that consists of a list that might also contain some duplicates, like:
foo
bar
baz
foo
bar
baz
To sort the contents you just need:
:sort
Resulting in:
bar
bar
baz
baz
foo
foo
While if you wanted to remove the duplicates too you would pass u:
:sort u
Resulting in:
bar
baz
foo
Miscellaneous tips and tricks
If you need your cursor to always be in the middle of the screen (this is modifying the ‘scroff offset’ option):
:set so=999
Move the cursor to the top, middle, bottom of the visible screen:
H: high (i.e. top of the screen)M: middleL: low (i.e. bottom of the screen)
Conclusion
So there you have it, my collection of useful Vim features that I use regularly. Let me know what you think. Anything surprising? What do you use that maybe I’ve missed?
Thanks for reading! ❤️
But before we wrap up... time (once again) for some self-promotion 🙊